This is a guide to get you started with Quest MT330. Please read and understand it completely before using Quest MT330. Other helpful resources are available in the how to section of this website.
Quest MT330 supports a wide selection of devices on the market and will support more as they become available. For an up to date list, please see here.
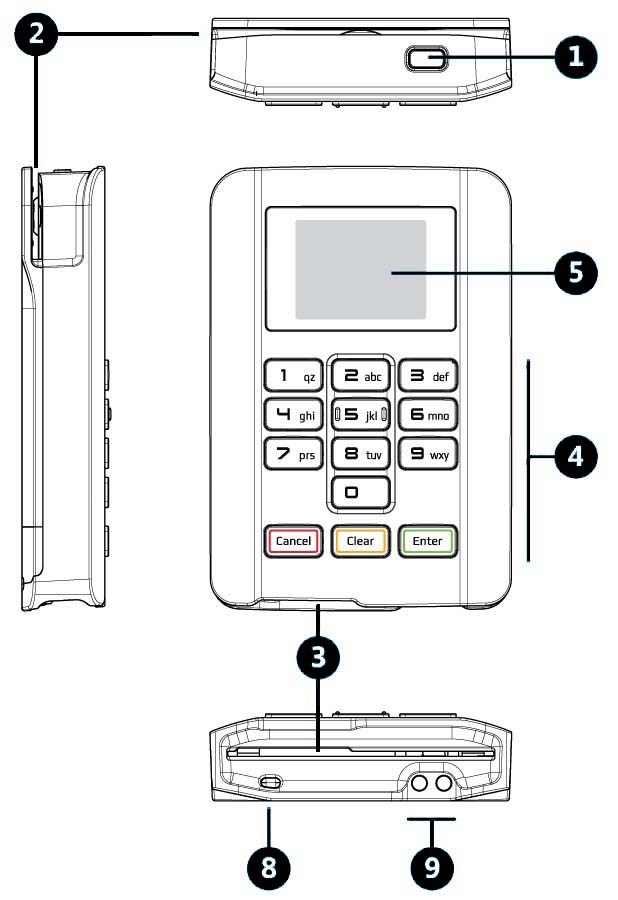
1 |
Power / Sleep Button |
2 |
Magnetic Swipe Channel |
3 |
Smart (Chip) Card Acceptor |
4 |
PIN Entry Keyboard |
5 |
Display |
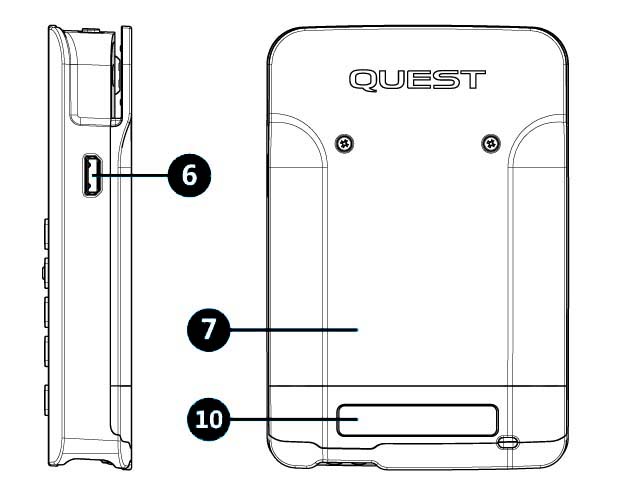
6 |
microUSB Connector |
7 |
Battery Cover |
8 |
Lanyard Attachement |
9 |
Charger Contacts |
10 |
Serial Label |
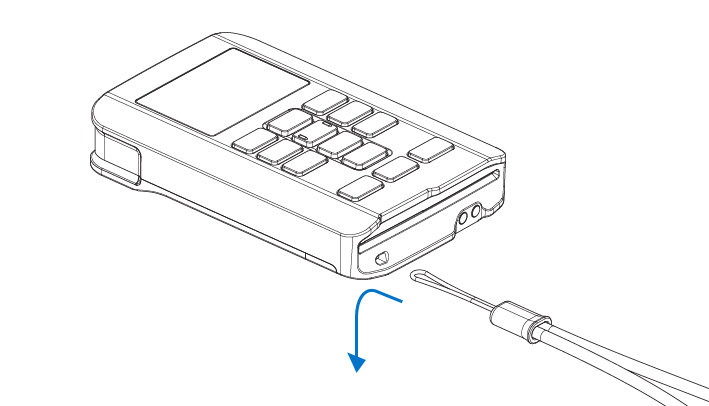
The Quest MT330 lanyard can be a convenient aid to pull Quest MT330 out of your pocket or put over your wrist freeing your hands to hold other objects.
Note:
Warning:
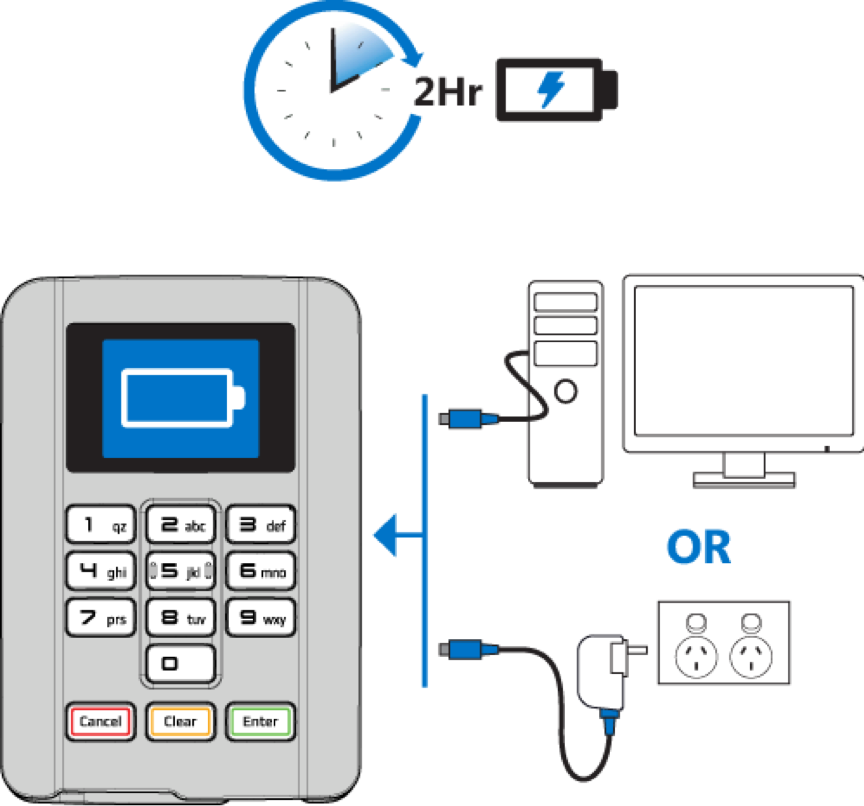
Quest MT330 is fitted with a 500mAh Lithium Ion Battery.
The following practices are recommended to maximize the battery life:
Note:
| State | ||
|---|---|---|
| Active | Transaction performed by Chip Card | 200 transactions |
| Sleep | Quest MT330 is asleep, ready to wake | 2 hours then Quest MT330 turns off |
| Off | Quest MT330 is off | 6 months |
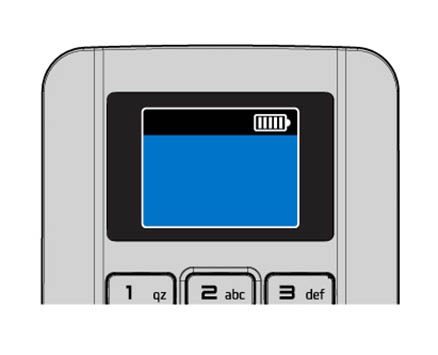
When the device is ON and idle, the Battery Status will be displayed in the top right hand corner.
| Battery Charge | Status Indicator | Description |
|---|---|---|
| 81% - 100% |  |
Battery fully charged. |
| 61% - 80% |  |
Battery with high charge level. |
| 41% - 60% |  |
Battery partially depleted. |
| 21% - 40% |  |
Battery low – Recharge recommended. |
| 30% | |
“Tap Card Disabled” shown on screen when transaction initiated with battery below this level. |
| 11% - 20% |  |
Battery Very Low. No Tap function available. |
| 0% - 10% |  |
Battery depleted – Recharge now! |
| Charging |  |
Battery charging |
If storing the device for longer than 7 days, fully recharge the device, followed by a recharge every 6 months.
To maximize battery life and prevent battery damage:
|
Battery is fully charged and can be left untouched for 6 months. |  |
|
BatteryBattery is low and should be charged before long term storage |  |
|
Battery is depleted and must be charged prior to being stored | |
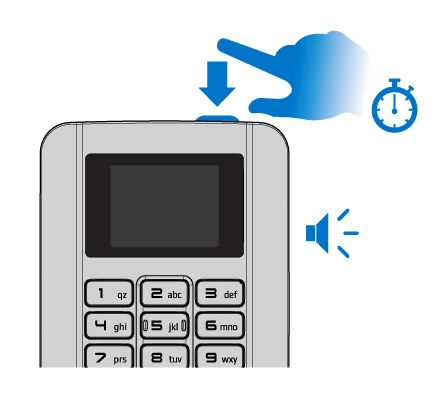
Press and hold the button located at the top of Quest MT330 for 3 seconds until you hear a beep tone, then release the button. The LCD will turn on.
Press and release the button to ‘Sleep’ Quest MT330. Note: A transaction started by your device will wake Quest MT330 from its ‘Sleep’ state.
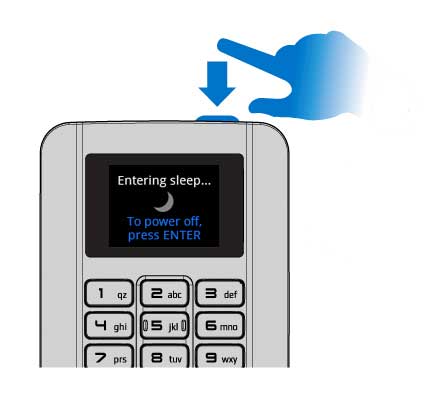
There are 2 options to turn off Quest MT330.
As Quest MT330 is entering 'Sleep', select ENTER on the Quest MT330 keypad.
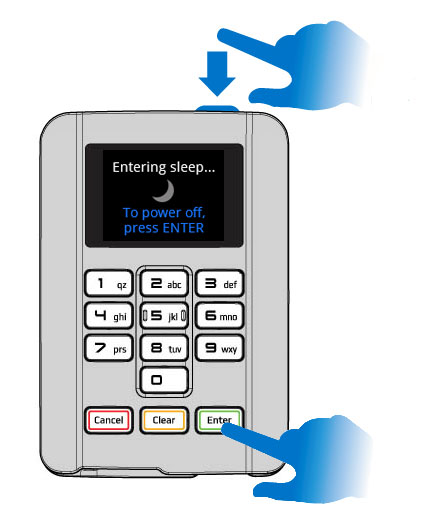
The Quest MT330 will then show that it is powering off.
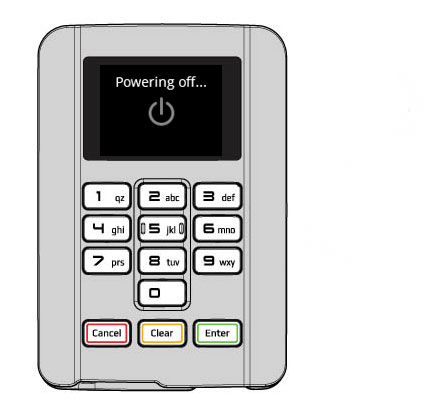
Alternatively, press and hold the button for 3 seconds until the LCD turns off.
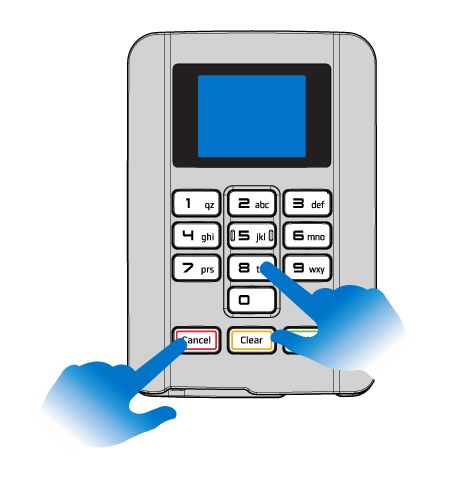
If for some reason Quest MT330 will not respond, hold down the ‘Cancel’ button and press the ‘8’ button to perform a cold restart. This function will also run the Quest MT330's power on self tests.
To use the Quest MT330 to perform a credit or debit card transaction, you will need to download the Quest 'Quest+NAB' app and download it on your chosen smartphone or tablet.
See here for detailed instructions on how to download and use the Quest+NAB app.
* Account selection is not required in all markets.
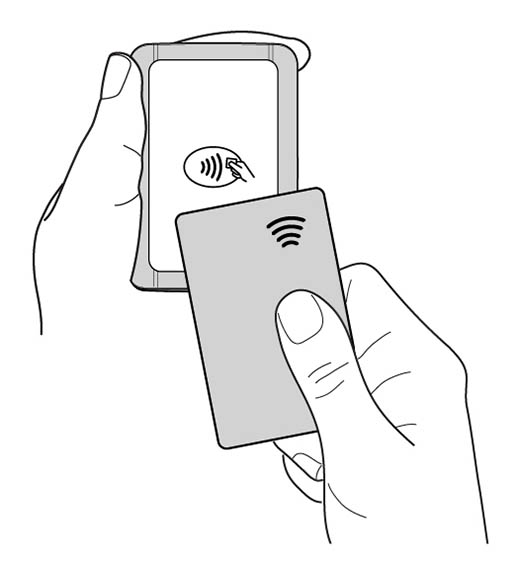
Cards with contactless capabilities can be accepted by tapping them on the rear of the Quest MT330.
Where the contactless logo is shown on the rear of the Quest MT330, simply hold the card over the logo until all 4 indicator lights are shown and the Quest MT330 beeps. The transaction result can then be viewed on the Quest MT330 display on the front of the unit.
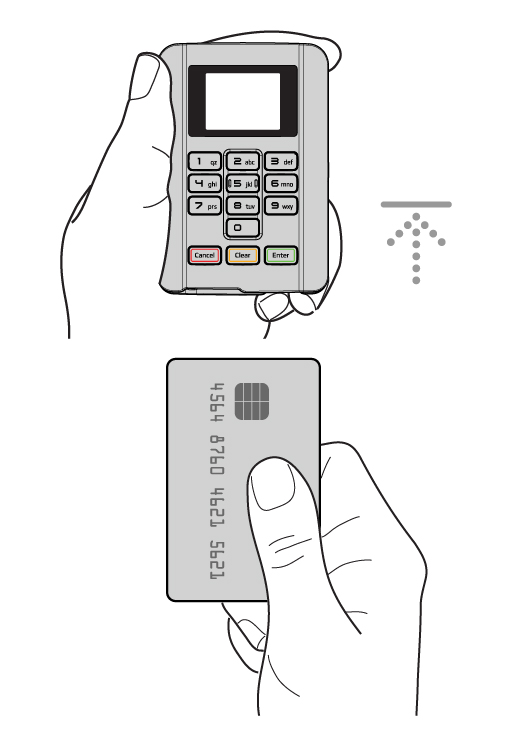
Cards with a chip will be required to be inserted into Quest MT330.
The ‘Chip’ on the card must be orientated upwards as shown below. The card must be inserted fully into Quest MT330 until it stops. Leave the card inserted until prompted on the display to remove the card.
Cards without a chip or cards with a faulty chip will be required to be swiped.
The magnetic stripe on the card must be orientated upwards as shown below. The card can be swiped in either direction. Swipe the card along the bottom edge of the slot with a smooth action. One pass through the slot should be adequate to read the card successfully. If the card cannot be read, Quest MT330 will prompt for the card to be swiped again.
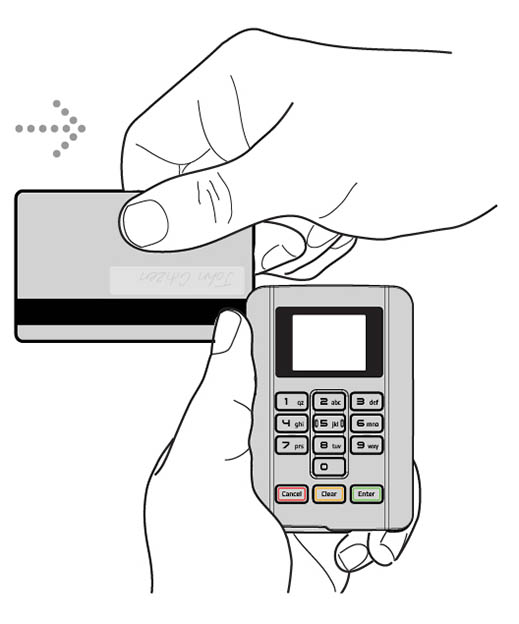
When required, Quest MT330 will prompt the Customer to enter their card's PIN. PIN entry should always be completed on the Quest MT330's secure keypad.

If required, Quest MT330 will ask the Customer to select an Account for the transaction. Each account will have a corresponding numeric button.

For Cheque (CHQ) Account - Press 1
For Savings (SAV) Account - Press 2
For Credit (CR) Account - Press 3
Pressing ‘Cancel’ (red button) at any stage before the customer enters their PIN, will void that transaction. Also use ‘Cancel’ to decline a prompt / question posed by Quest MT330.
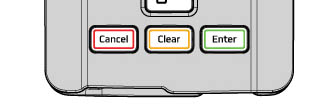
Pressing ‘Clear’ (yellow button) at any stage before the customer enters their PIN, will void that transaction. Pressing ‘Clear’ during PIN entry will clear all PIN numbers to allow PIN entry again.
‘Enter’ (green button) is used to accept a prompt / question posed by Quest MT330.
Paper receipts can be printed using the supported Bluetooth printers.
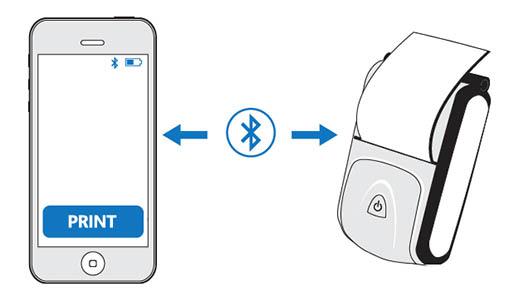
To learn how to operate your printer, refer to the Printer manufacturers User guide.
For an up to date list of compatible printers, please see here or contact the Support team.
If required, a replacement Lithium-Ion battery can be installed in Quest MT330.
| Part Name: | Part Number: |
|---|---|
| Quest MT330 Li-ion Battery | 270-0007-01 |
The Quest MT330 cradle contains charge contacts that connect directly to the outside of Quest MT330. Simply drop in Quest MT330 and walk away. Connect the Quest MT330 Cradle using a standard 5V microUSB cable (supplied with Quest MT330). Contact Sales for more information.
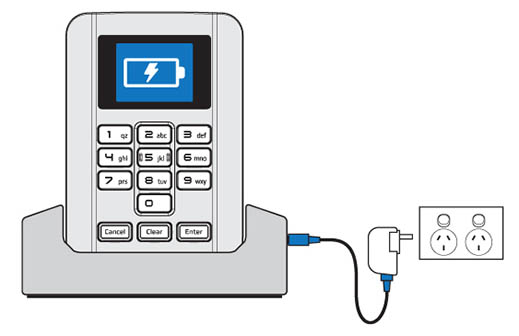
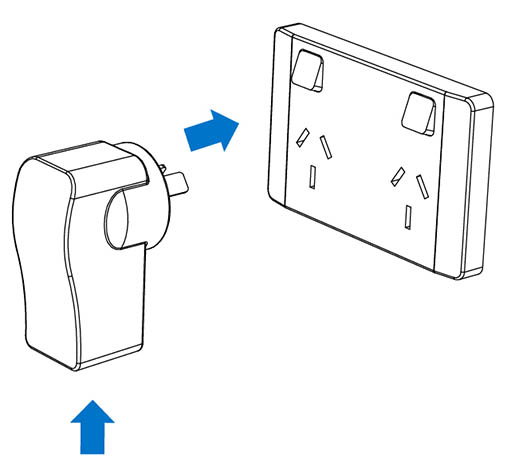
Certified for use with the Quest MT330, the USB Power supply is a compact alternative to charging using a 240V power outlet. Contact Sales for more information.
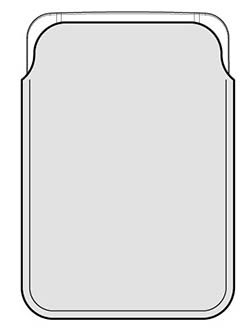
Protect Quest MT330 with our soft lined pouch, designed to exactly fit MT330. The pouch will significantly reduce the potential for pocket fluff to enter the Smart Card slot (which, if excessive can reduce the ability to read cards). Contact Sales for more information.
To accept Contactless payments, an optional accessory is required to be attached to MT330. Speak to Sales for more information on its upcoming release.
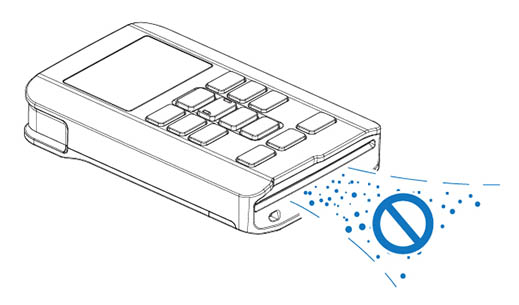
Care should be taken to avoid excessive dust / dirt / fluff / foreign objects to enter the Smart card slot. Using the Quest Carry Pouch can drastically reduce foreign material entering the device. Do not used damaged cards or cards with foreign objects attached (eg. sticky tape, stickers etc).
Turn off Quest MT330 (press and hold the Power button) before cleaning. Use a clean, micro fibre cloth to gently wipe the display and the case when required. Additionally, please ensure you:
Before operating Quest MT330, read and understand all instructions in this guide.
If your Quest MT330 gets stolen, please call the Support team immediately for remote deactivation. Acting promptly will help to reduce any potential for fraud.
At end of life, your Quest MT330 must be returned for secure disposal. Quest MT330 contains sensitive bank details. Contact the Support team to arrange for Quest MT330 to be returned and disposed of securely.

Quest warranty information can be found here.
Quest MT330 Getting Started Guide v3.1 (27-05-2018) -Copyright 2015 © Quest Payment Systems Pty Ltd